Saul Greenberg >
courses > HCI
topics > visual basic > tutorial 8
Tutorial 8: Transparant
Custom Controls - one way...
The goal of this
example is to just give you an example of how to set up a custom ActiveX control
that's transparant. It's actually pretty easy, so lets get into it. First thing's
first, you can download my project and all of this documentation in:
Okay let's build
this thing from scratch:
- First thing
you need is an image, and preferably a transparant one if you want a transparant
control. (I haven't actually tested this out with a non-transparant image
so no guarantees...). This oh-so-true gif was made in a shareware paing package.
I actually have a license for it I like it so much! If you don't have a favorite
paint package, it's a pretty nice one and you can download it a couple of
ways:
- they're
up to version 7, but it's a huge download (www.jasc.com)
- you can
still find version 3.12 or something like that around, which is a much
smaller download. go to www.download.com
and search for Paint Shop Pro.
- In Paint Shop
Pro, I just made myself a transparant gif with an obviously true message in
it. Transparant GIF is the best way to do this, because it forces you to set
one colour aside as a mask colour, which you have to set aside anyways in
VB as will be shown below. Anyways, here's the pic:
 my hip
picture
my hip
picture |
- You set the
transparancy in v7 anyways by going to the colors menu and choosing
set palette transparancy. It helps if you have the colour you
have in mind for your mask already as your background colour.
- Next, start
up VB with a standard exe.
- Add a user control
(go to the project menu and choose add user control)
- Change the (name)
property of the user control to a more appropriate one (I chose MikeIsRad
as my control name).
- Add an image
control using the
 (you don't need a picturebox) to the UserControl.
- Using the picture
property for that image control to select the image you made. Shrink the control
up so its about the size of the image you added. You'll end up with something
that looks like this:
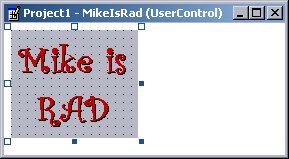 my UserControl
design
my UserControl
design |
- Now you need
to set some properties:
- Select the
image and set its enabled property to false. This
is to remove the necessity of forwarding events generated by the image
to the user control. It's a cheap way to just make it 'click through.'
- Select the
UserControl object and set the following properties:
- set
the windowless property to true
- set
the backstyle to 0 - transparant
- set
the maskcolor property to be whatever the background
colour of your image is (mine was white for ease of use) (note:
another way you can do this is to make two images: one
image is the transparant one you display, and the other one is your
mask image, basically with just a cutout representation of what in
your image you want displayed ... ie, an outline).
- set
the maskimage to be either your cutout image or the
same one you already used with the same background colour of your
maskcolor. VB will use this image / colour combo to
figure out what you want masked out and what you want displayed.
- lastly,
change the hitbehavior property to 2 - use paint.
- Now the code
for the UserControl is quite simple. Here's the whole shabang:
    Option Explicit
    Event Click()

    Private Sub UserControl_Click()
        RaiseEvent Click
    End Sub
- That's it for
the UserControl. Close the code and design windows for the UserControl and
go back to the main form design.
- You should have
a tool for your custom control now; add one of those to the main form.
- Then, set some
background picture on the form, just to convince you that the control is indeed
properly masked. (I picked a fabu CD cover from one of my favourite discs/lps).
- Here's how it
works: the custom control should now respond only to clicks directly
on displayed area. Any area that lies outside of the painted region of the
control won't respond to user input.
- Awesome. here's
the entirety of the code for the application:
    Option Explicit

    Private Sub MikeIsRad1_Click()
        MsgBox "Oh yeah, you got that right.", vbExclamation, "Mike is so rad"
    End Sub
- And we are
done. You'll end up with this window and interaction when you hit the play
button. You actually have to hit the letters to raise the event ... not just
in the region occupied by the control.
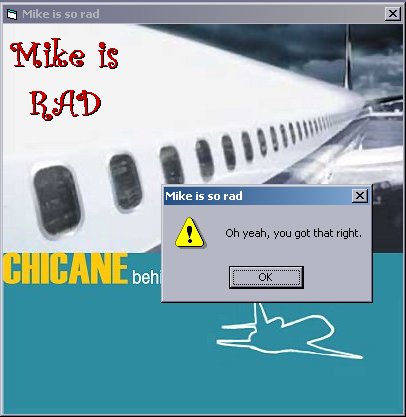 this program
tells the truth always
this program
tells the truth always |
And that, as we
say, is it.
by Mike Rounding,
credit to Mike Boyle, Shaun Kaasten
