fig 1: new project dialog box
The basic idea of the control as presented in all three of these examples is to demonstrate the basics in as simple a package as possible. As such, all I do is go through and make a useable control that is simply a button with reduced functionality. It has:
I'll go through each method for building, assuming you already know the basics of Visual Basic. At the top of each one, I'll explain briefly advantages and disadvantages to using that method and why and where you might want to use them.
To build an ActiveX control from scratch and compile it so that it is usable as a command button or a listbox is in other projects, you write the ActiveX Control and then compile it to an OCX file. The ocx file contains only the user controls that were part of the VB project you built it from and no extra stuff like forms or full programs. Think of simply having a library with button and a listbox in it, that would be the same idea. The advantage of this is that you can conveniently add it to any VB program you may start up from the components list. The disadvantage is that you can do this only provided that the machine you're working on (1) has that ocx file and (2) that ocx file is registered on the machine.
Now let's go through building this thing from scratch.
|
fig 1: new project dialog box |
 fig 2: control layout |
Option Explicit

' ================== HERE ARE SOME EVENTS
Event Click()
Event MouseDown(Button As Integer, Shift As Integer, X As Single, Y As Single)
' ================== HERE ARE SOME PROPERTIES
Property Get Caption() As String
    Caption = Command1.Caption
End Property

Property Let Caption(newCap As String)
    Command1.Caption = newCap
End Property
' ================== HERE ARE SOME USERCONTROL HANDLERS
Private Sub UserControl_Initialize()
    Command1.Caption = UserControl.Name
End Sub

Private Sub UserControl_Resize()
    Command1.Width = UserControl.Width
    Command1.Height = UserControl.Height
End Sub
' ================== HERE IS THE ACTUAL WORK FOR THIS ACTIVEX CONTROL
Private Sub Command1_Click()
    RaiseEvent Click
End Sub

Private Sub Command1_MouseDown(Button As Integer, Shift As Integer, X As Single, Y As Single)
    RaiseEvent MouseDown(Button, Shift, X, Y)
End Sub
And we are done! To use this control in another VB project, all you need to do is build it into its compiled form, and then register the produced ocx file in the Windows Registry. It should then appear in the components list in VB as your UserControl was named (reminder, the default project name is "Project1" which can be changed in the project properties dialog box. Note that the name of your UserControl cannot match the name of the project as VB produces the OCX file and names it <project name>.ocx!!).
Notes for CPSC 581 at the U of C on registering:
For the purposes of CPSC 581, this will likely be the easiest for distribution purposes. As you make a standard VB EXE project, you can include other things in it: forms, code modules, class modules, user controls, etc. When you include a UserControl, you are including the same thing as an ActiveX control project. The advantage to this is purely convenience and ease of use. When you build your exe project, the user control will be included in the binary exe file that is produced. This is not so in the case of other controls that are simply included from the components list. For example, the code for a command button never appears anywhere in your exe even if you use one in your program. The distinct advantage of this is that there is no registering required for the ActiveX control, you can just use it. The disadvantage is that if you want to use it in other programs, you won't be able to as it's not included in the components list. Of course you could just duplicate the code as well.
 fig 3: project menu |
 fig 4: add user control dialog |
|
fig 5: control layout |
Option Explicit

' ================== HERE ARE SOME EVENTS
Event Click()
Event MouseDown(Button As Integer, Shift As Integer, X As Single, Y As Single)

' ================== HERE ARE SOME PROPERTIES
Property Get Caption() As String
    Caption = Command1.Caption
End Property

Property Let Caption(newCap As String)
    Command1.Caption = newCap
End Property

' ================== HERE ARE SOME USERCONTROL HANDLERS
Private Sub UserControl_Initialize()
    Command1.Caption = UserControl.Name
End Sub

Private Sub UserControl_Resize()
    Command1.Width = UserControl.Width
    Command1.Height = UserControl.Height
End Sub

' ================== HERE IS THE ACTUAL WORK FOR THIS ACTIVEX CONTROL
Private Sub Command1_Click()
    RaiseEvent Click
End Sub

Private Sub Command1_MouseDown(Button As Integer, Shift As Integer, X As Single, Y As Single)
    RaiseEvent MouseDown(Button, Shift, X, Y)
End Sub
 fig 6: bitton in the toolbar! |
Then you can use it just like you would any other normal control in the components list. For fun, if you download the example it just demonstrates the "click" event using a message box.
The last way you can build controls is by using the help of the VB ActiveX Control Wizard Interface. Sounds impressive right? Well, it is because it makes a lot of free code for you, hehehe. The advantage of using this method over coding from scratch as was done in the above examples is that it generates extra stuff to do with saving properties and retrieving them later, although I won't go into the specifics of that here. Suffice it to say that it makes for less typing in a lot of cases and eliminates the possibility that you'll forget something (ie, you write a Let function for a property but not the Get one when you meant to have one!!). You can use the ActiveX Control Wizard to design controls for either of the build methods mentioned in the above two examples.
|
fig 7: project menu |
 fig 8: add user control dialog |
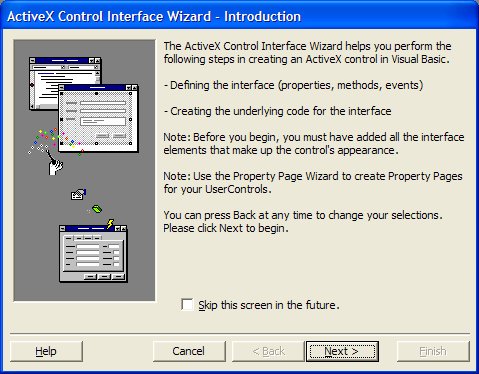
Step 1:Hahaha, turn off this screen in the future if you'd like! I usually do, hehehehe |
|
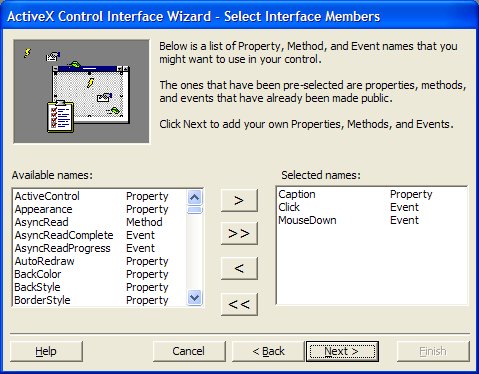
Step 2:Stock properties, events, and methods. On this screen you can choose from a list of commonly used events, methods and properties that you might want to support. For this example, the ones you want are pictured in the diagram. |
|
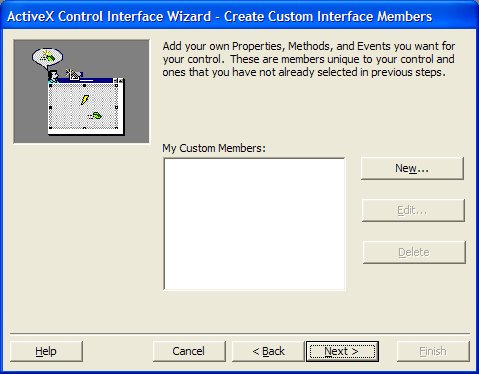
Step 3:Custom Interface elements. Here is where you can define your own events, methods, and properties. So if you wanted to have an event in your control called "Dude," here is where you'd define it. |
|
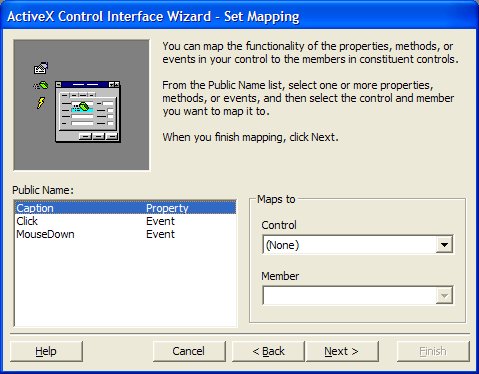
Step 4:(I have never really used this screen for anything but can figure it out if requested to do so, hehehe) |
|
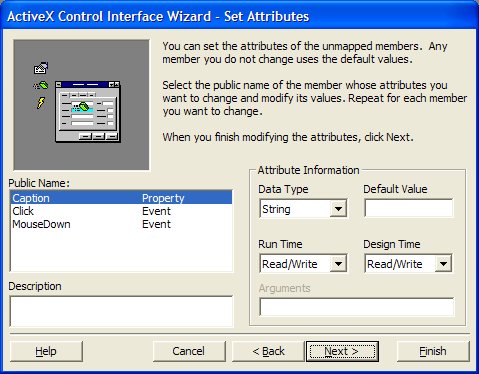
Step 5:Here you can determine some properties for your interface elements including type, default values, read/write capabilities, and even a description to help a developer out. For example you could relate to a developer just what the String property "Dude" was for. |
|
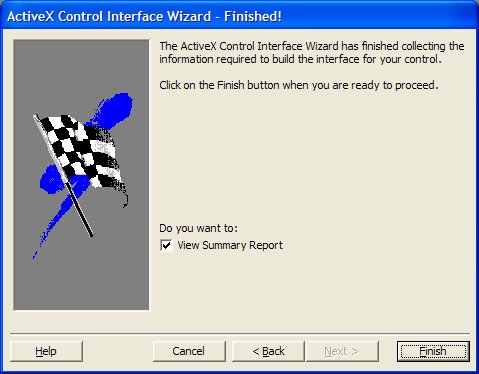
Step 6:And we are done, you can choose to view the summary report if you like, but it's mostly junk. |
 |
Option Explicit

'Default Property Values:
Const m_def_Caption = "Butoon"
'Property Variables:
Dim m_Caption As String
'Event Declarations:
Event Click()
Event MouseDown(Button As Integer, Shift As Integer, X As Single, Y As Single)

'added by mike
Private Sub Command1_Click()
    RaiseEvent Click
End Sub

'added by mike
Private Sub Command1_MouseDown(Button As Integer, Shift As Integer, X As Single, Y As Single)
    RaiseEvent MouseDown(Button, Shift, X, Y)
End Sub

'WARNING! DO NOT REMOVE OR MODIFY THE FOLLOWING COMMENTED LINES!
'MemberInfo=13,0,0,
Public Property Get Caption() As String
    Caption = m_Caption
End Property

Public Property Let Caption(ByVal New_Caption As String)
    m_Caption = New_Caption
    PropertyChanged "Caption"

    'added by mike:
    Command1.Caption = m_Caption
End Property

'Initialize Properties for User Control
Private Sub UserControl_InitProperties()
    m_Caption = UserControl.Name
    Command1.Caption = m_Caption
End Sub

'Load property values from storage
Private Sub UserControl_ReadProperties(PropBag As PropertyBag)
    m_Caption = PropBag.ReadProperty("Caption", m_def_Caption)
    Command1.Caption = m_Caption
End Sub

'added by mike
Private Sub UserControl_Resize()
    Command1.Height = UserControl.Height
    Command1.Width = UserControl.Width
End Sub

'Write property values to storage
Private Sub UserControl_WriteProperties(PropBag As PropertyBag)
    Call PropBag.WriteProperty("Caption", m_Caption, m_def_Caption)
End Sub
And we are allllllll done.